Easy Homemade Korean Rice Cakes to Try Now
If you’ve ever craved the chewy, tender delight of Korean rice cakes, you’re in the right place. This recipe for Homemade Korean Rice Cakes delivers an easy, beginner-friendly way to recreate those authentic, flavorful bites right in your own kitchen. Whether you’re aiming to master tteokbokki or just want a simple snack, this guide makes the process approachable, fun, and absolutely delicious.
Why You’ll Love This Recipe
- Simple Ingredients: Uses pantry staples that are easy to find and gentle on your wallet.
- Authentic Texture: Achieves the perfect chewy consistency that makes Korean rice cakes irresistible.
- Quick Preparation: Minimal hassle means you can enjoy your homemade treat in no time.
- Versatility: Perfect for various dishes, from spicy stir-fries to sweet treats.
- Fun to Make: A rewarding cooking experience that’s great for sharing with family or friends.
Ingredients You’ll Need
To craft delicious Homemade Korean Rice Cakes, you don’t need a long list of complicated ingredients. Each item plays a key role in building the authentic flavor and texture that make this dish special.
- Sweet Rice Flour: This is the base of your rice cakes, providing the chewy and sticky texture essential for authenticity.
- Water: Carefully measured to bring the dough together without making it too watery or dry.
- Salt: Just a pinch enhances flavor without overpowering the natural rice taste.
- Vegetable Oil: Used to prevent sticking during shaping and cooking, ensuring smooth handling.
- Optional: Tapioca Starch: Adds extra chewiness, but it’s not necessary for a beginner’s version.
Variations for Homemade Korean Rice Cakes
One of the best things about homemade Korean rice cakes is how easy it is to personalize them. Feel free to experiment with flavors, colors, and cooking methods to suit your palate, dietary needs, or creativity.
- Spicy Tteokbokki Style: Toss your rice cakes in gochujang and garlic sauce for a traditional spicy kick.
- Sweet Cinnamon Glaze: Coat the rice cakes with honey and cinnamon for a dessert twist.
- Vegetarian Version: Use vegetable broth if cooking rice cakes in soups or stews.
- Herb-Infused Dough: Add finely chopped green onions or sesame seeds directly into the dough for extra flavor and texture.
- Gluten-Free Adaptations: Stick to sweet rice flour and avoid additives to keep the dish naturally gluten-free.

How to Make Homemade Korean Rice Cakes
Step 1: Prepare the Dough
Combine sweet rice flour, salt, and water in a mixing bowl. Stir gently until the mixture forms a smooth, thick batter. It should be sticky but pliable, so adjust water slightly if needed.
Step 2: Steam the Dough
Transfer the batter to a greased heatproof dish or tray. Steam over boiling water for about 20 minutes until it firms up and becomes slightly translucent, signaling the perfect chewy texture.
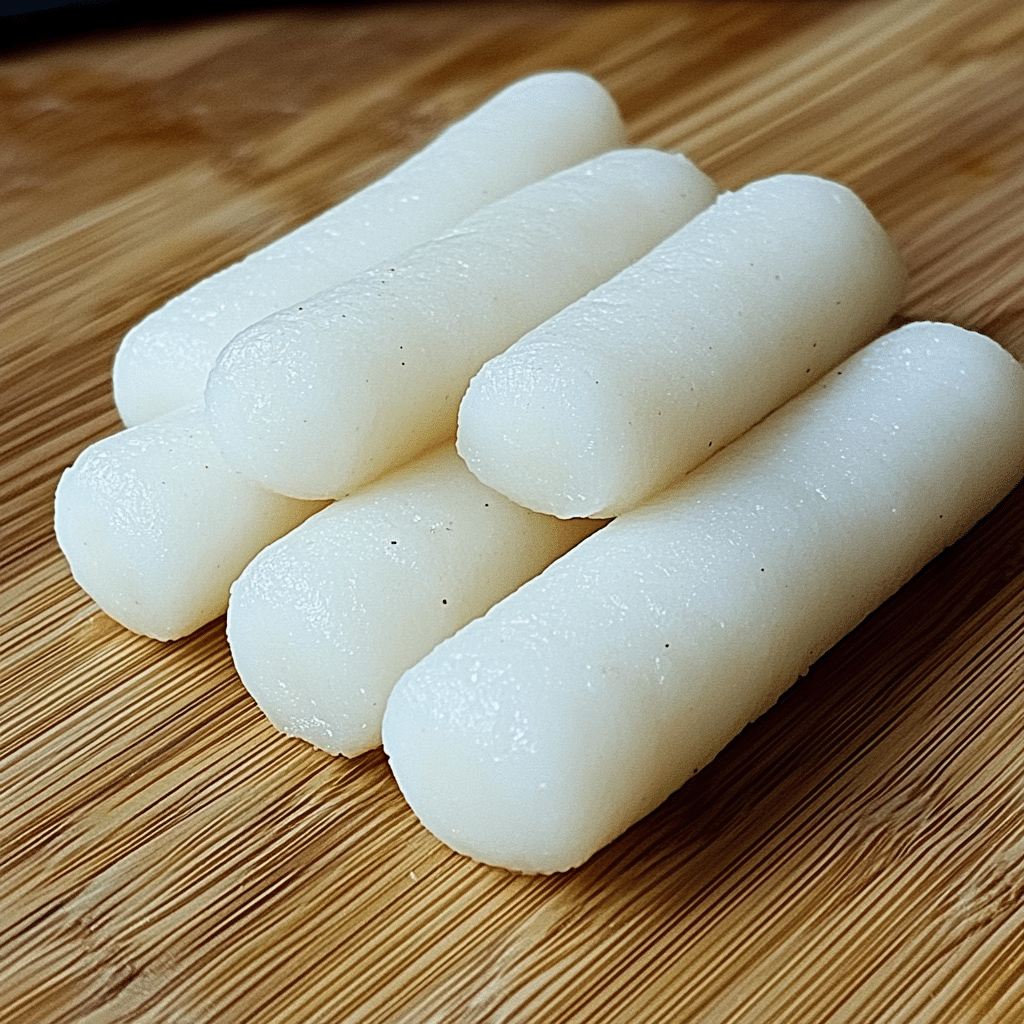
Step 3: Knead and Shape
After steaming, let the dough cool just enough to handle. Knead it on a lightly oiled surface to improve elasticity, then roll and cut into your preferred shapes — typically small cylinders or thin slices.
Step 4: Cook Your Rice Cakes
Boil the shaped rice cakes in water for 2 to 3 minutes until they float, or add directly to your recipe like stir-fried tteokbokki or savory soups.
Pro Tips for Making Homemade Korean Rice Cakes
- Consistency Check: The dough should be sticky but not watery; too much water can make it mushy.
- Steaming Time: Don’t skip or shorten steaming–this step sets the chewy texture perfectly.
- Oil Your Hands: Keep your hands and work surface slightly oiled to prevent sticking when shaping.
- Use Fresh Flour: Sweet rice flour works best when fresh; if too old, the texture can suffer.
- Cut Size Consistency: Cutting uniform pieces ensures even cooking and a professional look.
How to Serve Homemade Korean Rice Cakes
Garnishes
Top your rice cakes with toasted sesame seeds, sliced scallions, or a drizzle of soy sauce or chili oil to enhance flavor complexity and appearance.
Side Dishes
Homemade Korean rice cakes are fantastic alongside kimchi, pickled radishes, or steamed vegetables that balance out the chewy texture.
Creative Ways to Present
Try layering your rice cakes in a colorful hot pot, mixing them into stir-fried noodle bowls, or even skewering them for an on-the-go snack presentation that’s as fun as it is tasty.
Make Ahead and Storage
Storing Leftovers
Store leftover rice cakes in an airtight container in the refrigerator for up to 3 days. Keep them slightly oiled or wrapped in plastic wrap to avoid drying out or sticking.
Freezing
For longer preservation, freeze rice cakes in a single layer on a tray, then transfer to a freezer bag. They can be frozen for up to a month without losing texture.
Reheating
Reheat refrigerated or frozen rice cakes by boiling briefly or pan-frying with a splash of oil until soft and warm, restoring their chewy deliciousness.
FAQs
What is the difference between Korean rice cakes and regular rice cakes?
Korean rice cakes, or tteok, are typically made from sweet rice flour, giving them a chewy texture, whereas many Western rice cakes are puffed and crunchy.
Can I use regular rice flour instead of sweet rice flour?
Regular rice flour won’t yield the chewy texture characteristic of Korean rice cakes; sweet rice flour is essential for authenticity.
Are Homemade Korean Rice Cakes gluten-free?
Yes, since they are made primarily from sweet rice flour, they are naturally gluten-free, but always check ingredient labels if you have sensitivities.
How long does it take to make rice cakes from scratch?
From mixing the dough to steaming and shaping, expect about 30 to 40 minutes of hands-on time, making it a quick and satisfying project.
Can I add flavors directly to the dough?
Absolutely! Incorporating peppers, herbs, or spices into the dough is a great way to customize your rice cakes before cooking.
Final Thoughts
Jumping into Homemade Korean Rice Cakes is a delightful way to bring a piece of Korean cuisine into your kitchen. This recipe is approachable, fun, and full of real, authentic flavor that anyone can master. So roll up your sleeves and start creating your perfect chewy treat today — your taste buds will thank you!