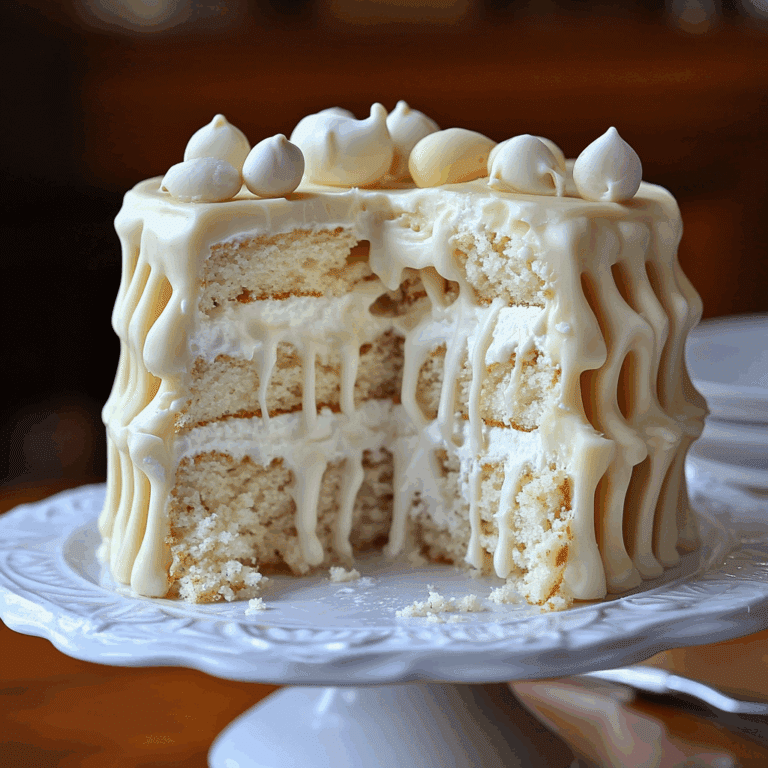
How to Make a Stunning Drip Cake Fast
Making a stunning drip cake fast is easier than you think! With just a few simple ingredients and straightforward steps, you can create an eye-catching dessert that looks professionally crafted and tastes irresistible. Whether you’re celebrating a birthday, special event, or just want to impress your friends with a show-stopping treat, this drip cake recipe will have you whipping up masterpieces in no time.
Why You’ll Love This Recipe
- Speedy preparation: You can put together a gorgeous drip cake quickly without sacrificing quality or flavor.
- Visual wow factor: The glossy, colorful drip creates an instant centerpiece on any dessert table.
- Customizable design: Easily adapt colors and toppings to match your event or personal style.
- Delicious and moist layers: Each bite is packed with flavor and perfect balance of textures.
- Simple ingredients: Uses pantry staples and minimal frosting for less fuss and maximum taste.
Ingredients You’ll Need
These simple ingredients come together to give you incredible taste, smooth texture, and vibrant drip effects. Each is essential in crafting a perfect drip cake quickly, without overwhelming your kitchen or your schedule.
- Cake mix or homemade sponge: Choose your favorite flavor as the base for fun layering possibilities.
- Buttercream frosting: Creamy texture that spreads easily and holds the drip well.
- White chocolate or candy melts: The key to a silky, shiny drip that sets just right on your cake.
- Heavy cream: Helps create a smooth ganache for that iconic drip effect.
- Food coloring: Adds vibrant hues to customize your drip color to fit any theme.
- Fresh fruits or edible decorations: Perfect finishing touches that elevate your cake’s appeal.
Variations for Drip Cake
Feel free to get creative when making your drip cake. This recipe is super flexible and can be tailored easily to fit dietary preferences, seasonal themes, or your favorite flavors.
- Fruit-filled drip cake: Add fresh berries between layers for a juicy surprise inside.
- Vegan drip cake: Use plant-based buttercream and nondairy chocolate for a cruelty-free treat.
- Chocolate lovers’ drip cake: Swap vanilla cake for rich chocolate and use dark chocolate ganache.
- Nutty drip cake: Incorporate crushed nuts into frosting or as toppings for added texture.
- Colorful drip cake: Experiment with multiple drip colors for a whimsical, rainbow effect.

How to Make Drip Cake
Step 1: Bake and Cool the Cake Layers
Start by baking your cake layers according to your favorite recipe or box instructions. Once fully baked, let them cool completely on a wire rack. This step ensures stable layers and prevents the frosting from melting.
Step 2: Prepare the Buttercream Frosting
Create a smooth and fluffy buttercream by beating butter until creamy, then gradually adding powdered sugar and a splash of vanilla. This frosting acts as the perfect crumb coat and final layer to hold the drip in place.
Step 3: Assemble and Crumb Coat the Cake
Stack your cooled cakes, spreading a layer of buttercream between each. After stacking, apply a thin “crumb coat” layer of frosting around the entire cake to seal in crumbs, then chill it for 15-20 minutes to set.
Step 4: Make the Drip Ganache
Heat heavy cream until just about boiling, then pour it over chopped white chocolate or candy melts in a bowl. Let it sit for a minute, then stir gently until smooth. Add food coloring as desired to create your drip’s signature shade.
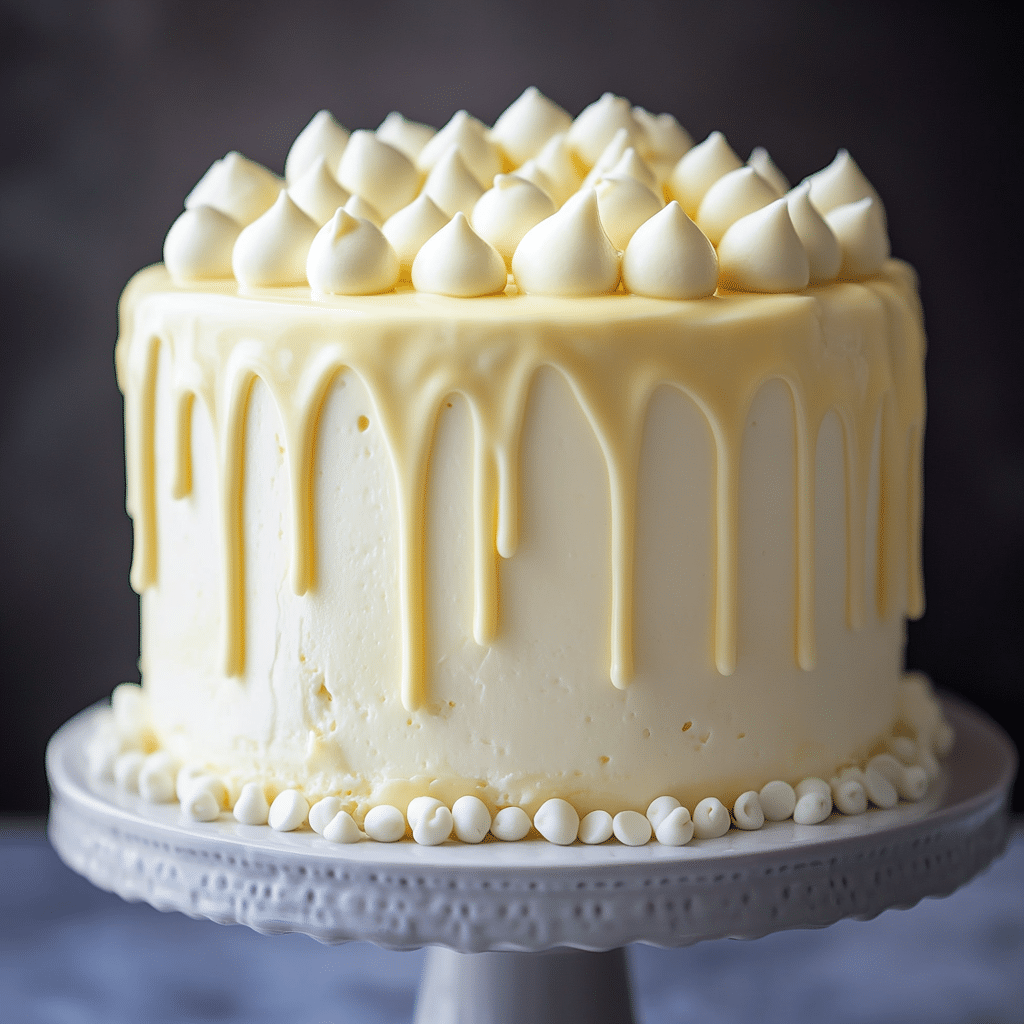
Step 5: Apply the Drip
Allow the ganache to cool slightly but remain pourable. Using a spoon or piping bag, gently drizzle the drip around the edge of the cake, letting it cascade down naturally. Then smooth the top with the remaining ganache for a flawless finish.
Step 6: Decorate and Chill
Top your drip cake with fresh fruits, sprinkles, edible flowers, or any other decoration. Chill the cake briefly to let everything set perfectly before serving.
Pro Tips for Making Drip Cake
- Temperature control: Ganache should be warm, not hot, for the perfect drip consistency.
- Use chilled cake: A cold cake helps the drip set quickly, preventing it from running too far.
- Practice your drip technique: Start with small amounts of ganache until you master the right flow.
- Color blending: Mix colors gradually for ombre or marbled drip designs.
- Keep it simple: Don’t overload with decorations; let the drip be the star.
How to Serve Drip Cake
Garnishes
Enhance your drip cake with vibrant garnishes like sliced fresh strawberries, blueberries, edible gold flakes, or colorful sprinkles. These add texture and eye-catching contrast, making each slice look as appealing as it tastes.
Side Dishes
Serve your drip cake alongside light options like a scoop of vanilla ice cream, fresh fruit salad, or a dollop of whipped cream. These complement the rich sweetness and balance the flavors beautifully.
Creative Ways to Present
Place your drip cake on a decorative cake stand for a statement piece, or create mini drip cakes or cupcakes using the same technique for individual servings. Personalize the presentation with themed toppers or edible glitter for celebrations.
Make Ahead and Storage
Storing Leftovers
Cover your drip cake loosely with plastic wrap and store it in the refrigerator. This keeps the frosting firm and preserves freshness for up to 3 days, making it easy to enjoy leftovers without losing quality.
Freezing
You can freeze the drip cake wrapped tightly in plastic wrap and then foil for up to 2 months. Thaw in the fridge overnight for best results, maintaining moist layers and intact decorations.
Reheating
Allow the cake to come to room temperature before serving to revive the softness and flavor. Avoid microwaving to preserve the integrity of the frosting and drip details.
FAQs
What is the best chocolate for drip cakes?
White chocolate or candy melts work best because they melt smoothly and can be colorized easily, giving you that perfect glossy drip effect.
Can I make a drip cake without a special piping bag?
Absolutely! Use a spoon or a small cup to pour the ganache carefully around the edges for an equally beautiful drip.
How thick should the buttercream be under the drip?
The buttercream layer should be smooth and firm enough to hold the ganache without melting, ideally chilled before applying the drip.
Can I prepare the drip cake a day ahead?
Yes! You can bake, assemble, and apply the drip the day before, then refrigerate it. Just bring it to room temperature before serving.
How do I prevent the drip from sliding off the cake?
Chill the cake well before applying the drip and ensure the ganache is at the right pouring temperature—not too hot or thin—to control the drip flow.
Final Thoughts
Making a drip cake fast doesn’t mean you have to skimp on style or taste. With these easy steps and versatile tips, you’ll have a dazzling dessert ready in no time, impressing both your eyes and your taste buds. Go ahead, try your hand at this fun and rewarding recipe—your next celebration deserves it!